Showing posts with label Web Server. Show all posts

Monday, November 4, 2019

Setting Up the PeopleSoft Web Server for ODA

This post will describe the steps to setup the PeopleSoft web server for Oracle Digital Assistant (ODA) - Chatbots. This post will also go through some tips and tricks that are not covered in PeopleBooks (at the time of writing).

PeopleBook Reference: Setting Up the Web Server for the Chatbot

Creating a new 'external' site on the web server domain

This step should be pretty straight forward for a PS Admin. But for someone like me who does not have a lot of PS Admin background, it was a struggle to find the right information and create a new 'external' site on the PeopleSoft web server domain. Based on my experience creating this new site, I wrote a separate blog post to cover this topic and demystify some of the admin configuration and jargon.

Refer: Create new (external) site in a PUM Image

Note: This information is not in PeopleBooks but I was told that the new site can use the same web profile as the other existing site for regular PIA access. Since, my current environment is a HCM 9.2 - PI 31 created on OCI by PeopleSoft Cloud Manager, the delivered default site for the PIA is peoplesoft01 and it uses the delivered PROD web profile. So, I created my 'external' site using the PROD web profile using the procedure described in the blog post referenced above.

Copying the Web SDK (delivered ochatjs folder) to the new 'external' site

This step is also self explanatory. The one challenge I had was that my PUM image (HCM 9.2 - Image 31) was running on Oracle Cloud Infrastructure (OCI). I generally use WinSCP to perform file transfers, etc. to the servers. The default user 'opc' (Oracle Public Cloud) which we use to connect to OCI via WinSCP does not have the appropriate privileges to copy the Web SDK to the 'external' site.

Graham Smith, Oracle ACE Director, from Cedar Consulting UK showed me a neat trick to use WinSCP, login as the default user 'opc' and then switch to 'root'. I am forever thankful to him for this because it helps avoid the use of command line for such tasks.

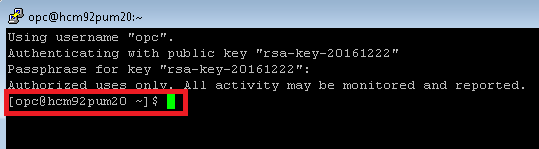
How to use WinSCP to connect to PS Servers on OCI as root?

Use SCP Protocol, 'opc' user, set the private key in the authentication settings and use "sudo su -" in the SCP/Shell settings.


Copying the ochatjs folder (web SDK) to the external site

Source: ochatjs.zip file located in <%PS_APP_HOME%>/setup/chatbot

In my case, since I am using a HCM 9.2 - PI 31 running on OCI (created by PeopleSoft Cloud Manager), the ochatjs.zip was located here.

/u01/app/oracle/product/pt/ps_app_home/setup/

Destination: <PIA_HOME>\webserv\<DOMAIN_NAME>\application\peoplesoft\PORTAL.war\external\

In my case, since I am using a HCM 9.2 - PI 31 running on OCI (created by PeopleSoft Cloud Manager), the extracted ochatjs folder was placed here.

/u01/app/oracle/product/pt/ps_cfg_home/webserv/WEBSERVER01/applications/peoplesoft/PORTAL.war/external/

Verification

We can verify the success of the web SDK installation by accessing the following URL on a web browser.

https:\\<your server name>:port\external\ochatjs\loader.json


DIY PeopleSoft Chatbots

Chatbots are here in PeopleSoft! The PeopleSoft Chatbot Integration Framework was delivered via Enterprise Components in various Applications (HCM, FSCM, CS, etc.). Utilizing this framework, HCM delivered the 'Absence Assistant' Chatbot in PUM Image 31.

Using an Oracle Cloud trial account, I went through the exercise of spinning up a HCM 9.2 - PI 31 instance on Oracle Cloud Infrastructure (OCI) using PeopleSoft Cloud Manager, creating an Oracle Digital Assistant (ODA) instance on OCI, uploading the delivered 'Absence Assistant' Skill to ODA, configuring the ODA Skill/Channel to point to the HCM instance and likewise configuring the HCM instance to point to the ODA Skill/Channel!

Here is a demo of the 'Absence Assistant' Chatbot in action!


Hat Tip

I am very thankful to all Oracle PeopleSoft and ODA Product Managers, PeopleSoft Development team and PeopleSoft Support team for answering all my questions and pointing me in the right direction. Too many to list them all but they know who they are! Their insights are much appreciated.

Before you get started

Use HCM 9.2 PUM Image 32

If you are just getting started, I would highly recommend you to start with HCM 9.2 PUM Image 32. I started my proof of concept on PUM Image 31 and ran into several issues that were fixed in PI 32. Among other things, I had to pull out certain bugs (30151468, 30151584, 30150506) and the web SDK (ochatjs.zip) from PI 32 and apply them to my PI 31 instance. You will save yourself a lot of time simply by starting with PI 32!

Setup the <Proxy User> userid in PeopleSoft

Before we go any further, it would be a good idea to go ahead and setup the <Proxy User> userid in the HCM instance. This will be needed in the ODA Skill configuration.

PeopleBooks: Understanding Security for Chatbot Integration Framework

Configuration Steps - Blog Series

The following steps detail all the configurations that are necessary to setup the PeopleSoft - ODA Chatbot integration. This series of blogs address several practical tips, tricks and lessons learnt that might not be covered in PeopleBooks and other documentation.

Step 1: Setup PeopleSoft Web Server for ODA
Step 2: Setup the ODA instance on OCI
Step 3: Configure the delivered Skill in ODA
Step 4: Configure PeopleSoft to point to the Skill/Channel in ODA

Friday, December 30, 2016

DIY - PeopleSoft on the Cloud - Part 2

Now that we have the PeopleSoft PUM Image (DEMO environment) up and running on the Oracle Compute Cloud, we can move on and dive deeper into more interesting topics! This post will detail how we can set up SSH access and connect to the PUM Image via PuTTY and WinSCP to perform PSADMIN activities such as configuring, bouncing and clearing cache on the app/web/process scheduler servers.

Step 1: Create Security List for SSH access and add to the instance

Create Security List:

Oracle Compute Cloud Service console > Network tab > Security Lists > Create Security List


Create Security Rule:

Oracle Compute Cloud Service console > Network tab > Security Rules > Create Security Rules


Add Security List to Instance:

Oracle Compute Cloud Service console > Instances tab > Instances > View > Under "Security Lists" > Add to Security List

In my example, the security list that I added is called 'allow_admin_clients'.


Step 2: Configuring PuTTY and logging in to the instance using SSH

After creating the Security List and adding the instance it (step 1), we are now ready to proceed with the steps detailed in the tutorial:
- Logging in to your instance using SSH

The steps detailed in this section of the tutorial are straight forward. I was able to use the "Logging in from a Windows System" instructions and connect to my PUM image (running on OPC - Oracle Public Cloud) via SSH using PuTTY running on my on premise workstation.


Note: The first time we successfully login via PuTTY as opc user, we will be prompted to change the default password (OracleCloud). Make sure that you change and notate the new password!

Refer: Changing the default password for opc user

Step 3: Configuring WinSCP and logging in to the instance using SCP

Before I proceed with demonstrating how to access PSADMIN using PuTTY, I want to detail how to similarly configure WinSCP to connect to the instance running on OPC. I use WinSCP heavily for various activities such as navigating to and deleting web server cache folder, viewing db/app/web server log files, loading custom javascript libraries to the web server, loading custom jar files to the app/web servers and so on.

Open WinSCP > New Site
- File protocol: SCP
- Host name: Enter the public IP of your instance
- Port number: 22
- User name: opc
 Advanced Site Settings > SSH > Authentication:
- Private key file: Point to the location where you stored your SSH private key (.ppk)


Save the configuration and login. You will be prompted to enter your SSH Key passphrase.


Step 4: Accessing PSADMIN via PuTTY

We already saw in step 2, how we could connect to the instance via PuTTY. This involves using the opc user provided to us as part of the tutorial instructions.


In order to access, PSADMIN it is best if we use psadm2 (one of the default users created in PUM images). Here are the commands that allow us to switch from opc user to psadm2 user and invoke PSADMIN.

Command: sudo -s
Description: Switch to root

Command: su psadm2
Description: Switch to psadm2

Command: cd $PS_HOME/appserv
Description: Change directory to appserv folder under $PS_HOME

Command: ./psadmin
Description: Invoke PSADMIN


Once we are in PSADMIN as psadm2 user, the steps to bounce and purge cache on the app/web/process scheduler servers are the same as detailed in one of my older posts.
Refer: PeopleSoft PUM Image - Virtual Machine - How to access PSADMIN

We are now able to access PSADMIN of our demo instance (PUM image running on OPC) via PuTTY (SSH) from an on premise workstation!

Monday, June 13, 2016

PeopleTools 8.55 - Oracle JET - Using ACE Editor for Online Branding Objects (HTML, JavaScript, Style Sheets)

Have you ever wondered if there is a better way to edit the "Branding Objects" that are available online (PeopleTools > Portal > Branding > Branding Objects)?

If you have managed Branding Objects (JavaScript, HTML and CSS) online, you would have noticed that the editor is a simple 'textarea'. It is not a great UI and it makes it really difficult to manage/write anything more than a few lines.

E.g.:


Although it is great that, starting with PeopleTools 8.53, we now have the ability to manipulate javascript, html and css objects online (instead of using App Designer), the major part of reading/understanding/writing the code probably needs to be done outside on a text editor which has better support for the markup/syntax.

Why not a code editor for the web?

If you attended Jim Marion's popular session 'PeopleTools Tips and Techniques' either at Oracle OpenWorld 2015 conference or HEUG - Alliance 2016 conference, you might have seen him show us how he created a custom page to manage javascript content using ACE Editor. When I asked him how he built something like that, he mentioned that he used AJAX to marshal the content and the page itself is fronted by a component for searching, but is really an iScript for display and an iScript for saving. It was a brilliant idea to use a high performance code editor to manage such objects (some features/benefits include auto complete, syntax highlighter for over 100 languages, better maintenance/display of indending/outdending, folding function/code modules and overall better readability).

Jim's approach involved storing the javascript contents in a custom table and then referencing them as needed. I wanted to take the same idea and create a mechanism to integrate ACE Editor with any page field (textarea). At the same time, I did not want to customize anything. So, I want my approach to be very similar to creating/enabling Rich Text page fields but instead of using App Designer, I want to simply inject a custom javascript to the page and enable the ACE Editor. Another difference with my approach is that I want to use JavaScript and the component processor to take care of marshaling and saving the data instead of using the AJAX/IScripts option.

Do any challenges come to mind?

- How do we replace the existing 'textarea' on the page with the ACE Editor?
- Next, how do we transfer the contents of the ACE Editor to the page field 'textarea'?
- Next, how do we make the component processor accept and honor this change made to the buffer via JavaScript (especially because we are not customizing the page and the page field may not have the 'Modifiable by JavaScript' setting enabled)?

Here are steps I went through to integrate ACE Editor with the PeopleTools - Branding Objects Page. If you like this idea and implementation, then please click here to vote for it on My Oracle Support Community.

Note:
  1. A similar approach could be used to extend the ACE Editor functionality to any other page field - textarea.
  2. I used the latest version of my 'Global JavaScript/Style Sheet Injection Bootstrap' (using Oracle JET and more importantly requireJS) to inject a custom javascript into the 'Branding Objects' page. If you choose not to use this approach, then you will need to find an alternative way to inject the custom javascript but the core functionality of the js code should work as described. (Refer: 'Using Oracle JET' series - Part 1, Part 2, Part 3 and Part 4).
Step 1: Download the ACE Editor library and store it locally on the web server

I downloaded the ACE Editor library from the following github URL and placed it on my web server:
https://github.com/ajaxorg/ace-builds/archive/master.zip

Web Server:


Just to show the library folder structure, here is a screenshot highlighting the path to the ace.js file.


Step 2: Add new function cskGetFormName() to our JS Bootstrap (CSK_FL_BOOTSTRAP_JS)

Function Name: cskGetFormName


This function helps us resolve the %FormName meta-html which is not available currently for client side javascript. So, we cannot use it, for example, as submitAction_%FormName in a client side javascript. The expectation is that it would resolve itself to submitAction_win0, submitAction_win1 or submitAction_winN depending on the current window. So, I wrote this function to determine the %FormName portion as a string, which I will be using in the next step as part of FSU_ACE_CFG_JS javascript code.

Step 3: Create Custom JavaScript Object (CSK_ACE_CFG_JS) to configure the ACE Editor on the desired page

JavaScript Object: CSK_ACE_CFG_JS


Explaining the Script:
  • First, you will notice that I am adding the ACE Editor library path to the requireJS configuration locally instead of using the requireJS configuration script object (CSK_REQUIIRE_CFG_JS). The reason I am appending to the requireJS paths locally is because, we don't want this library to get loaded for the entire application, rather just conditionally to a specific page. In step 4, I will detail how to achieve that using the Global Injection Bootstrap (CSK_FL_BOOTSTRAP_JS).
  • Next, I am defining jquery, ace.js and jqueryui as dependencies for the function execution using requireJS.
  • Inside the function execution, I included BOOTSTRAP 3.0.0 (which was downloaded from this link and stored in a custom object) and JQUERY 1.8.17 (delivered object) CSS. I am using the custom function cskLoadCSS to take care of the CSS loading.
  • Next, I search for the textarea (id="PTBR_MGOBJ_WRK_PTBR_HTMLAREA1"), hide it and replace it with the ACE Editor div.
  • Now the delivered textarea is hidden and our custom ACE Editor is in the DOM. Further, I used a basic set of configuration options for the Editor which we can certainly expand depending on our use case (ACE Editor is highly configurable). Also, I am dynamically setting the mode of the Editor to either html, javascript or css depending on the object type that we are updating. As part of the Editor configuration, I also initialized the contents of the ACE Editor with the contents of textarea.
  • Lastly and most importantly, we update the textarea (now hidden) with the latest contents of the ACE Editor any time there is a change in the editor contents. 
  • addchg_%FormName Function: The trick to make the component buffer accept and honor the changes made to the textarea (PTBR_MGOBJ_WRK_PTBR_HTMLAREA1) - via client side javascript - is to use the addchg_%FormName function. I had no idea about the existence of such a function and its significance. I learned about this gem from Chris Malek while discussing and troubleshooting an unrelated issue with Fluid!

Step 4: Conditionally Load ACE Editor Config JavaScript (CSK_ACE_CFG_JS) using the Global JavaScript Injection Bootstrap

The conditional logic to only load CSK_ACE_CFG_JS on the Secondary Page PTBR_ADDHTML_SEC, can be found in the cskInjectJS function which is part of CSK_FL_BOOTSTRAP_JS object. An updated version of CSK_FL_BOOTSTRAP_JS source code can be found here.


Results:

HTML:


JavaScript:


CSS:


Now we are ready to enjoy the ACE Editor for writing code! Once again, if you like this idea and implementation, then please click here to vote for it on My Oracle Support Community.

Sunday, May 29, 2016

PeopleTools 8.55+ - Using Oracle JET (JQuery, JQueryUI, requireJS and more) - Part 2

In my recent post (click here), I detailed how we could use Oracle JET to safely and efficiently take advantage of some the common open source libraries such as JQuery, JQueryUI, requireJS, etc. I also created a cleaner version of my JavaScript Injection Bootstrap and used it to inject a custom javascript (which uses JQuery) to add an environment specific header for both Fluid and Classic in PeopleTools 8.55.

In this post, I want to continue with that process and re-write the configurable image replacement technique that I described for PeopleTools 8.54 (click here for more details).

IScript for Image Object Source URL Resolution:
 
Reference to the previous version of the IScript: Click here.

Since using meta-HTML such as %Image and %JavaScript does not work in JavaScript objects, I created my own version of  an IScript which returns the URL referencing an image object on the web server (loaded on the cache directory).

WEBLIB_FL_CSK.ISCRIPT1.FieldFormula - IScript_CSK_GET_IMG


PeopleCode for reference:

Function IScript_CSK_GET_IMG
  
   Local string &img = %Request.GetParameter("img");
  
   &url = %Response.GetImageURL(@("Image." | &img));
   %Response.RedirectURL(&url);
 
End-Function;


Create a custom javascript function and add it to the JavaScript Injection Bootstrap (CSK_FL_BOOTSTRAP_JS):

This function would help us to mask some of the details to access the preceding IScript to get the Image URL (similar to the getScriptURL function which I borrowed from Jim Marion's blog).

Function Name: getImageURL


Let us add this function to the JavaScript Injection Bootstrap:


Configurable JavaScript for Image Replacement (CSK_OVERRIDE_IMAGE_JS):

Object Name: CSK_OVERRIDE_IMAGE_JS


This javascript object CSK_OVERRIDE_IMAGE_JS is a re-write of my previous version which was called CSK_FL_IR_JS. You will notice that I am using requireJS to load the JQuery library that I need for this function execution. I am also using the getImageUrl function which I previously detailed to get the URL of the custom images. These URLs will be used to override the corresponding delivered counterparts. Right now, I have two examples for image replacement: 1) Replace the delivered Favorite Icon with a custom image (CSK_LOGO_FAVICON) and replace the delivered 'Processing' icon for Fluid with a custom image (CSK_PROCESSING_FMODE).

LOGO_FAVICON (delivered):


CSK_LOGO_FAVICON (custom):


PT_PROCESSING_FMODE (delivered):


CSK_PROCESSING_FMODE (custom):


Similarly, we can configure additional image replacements by simply appending code to the CSK_OVERRIDE_IMAGE_JS javascript object.

Load Image Replacement JavaScript using the Fluid JavaScript Injection Bootstrap:

Simply add CSK_OVERRIDE_IMAGE_JS to the cskInjectJS function in CSK_FL_BOOTSTRAP_JS object.


Results:


Friday, May 27, 2016

PeopleTools 8.55+ - Using Oracle JET (JQuery, JQueryUI, requireJS and more) - Part 1

If you followed some of my previous posts related to Fluid Branding, you would have noticed that I complained a fair bit about 8.54 and 8.55 not delivering jQuery by default for Fluid UI. Although, I still think that it is a missing feature in 8.54, I found that Oracle has delivered something better in 8.55. This is not really mentioned in great detail anywhere, but if you look on the web server, you will find that Oracle JET (Oracle JavaScript Extension Toolkit) is available. For those who are not aware, it is like a package of all the commonly used open-source js and css libraries put together. In addition to the open-source libraries, Oracle JET also contains a set of Oracle contributed js libraries.

Web Server:


Oracle JET usage in charts:

I also noticed this in a few Fluid pages containing charts, when I inspected the DOM elements. I have not seen widespread usage in other areas.


If you have read some of my previous Fluid Branding posts (Part 5B and Part 5C) where I described how I created a Fluid JavaScript Injection Bootstrap and few other advanced Branding topics using JavaScript and JQuery, you would notice that I hacked (for lack of a better term) my way through the requirements. I will admit that my js code was probably not the most efficient. In this post and perhaps other follow up posts (Part 2 and Part 3), I plan to revisit some of the javascript and rewrite the logic using Oracle JET (e.g.: Fluid JavaScript Injection Bootstrap and Environment Specific Header for Non-Prod databases).

In the following sections, I intend to cover the topic of using JQuery and JQueryUI libraries safely in conjunction with requireJS - available in Oracle JET on PeopleTools 8.55+ applications. When I say 'safely', I mean to safely manage dependencies using requireJS. Jim Marion has already written about how to achieve this in an 8.54 environment (and probably in several other posts on his blog where he covered the usage in previous tools versions as well).

If you are a fan and a follower of Jim Marion's PeopleSoft Journal blog (like myself) and if you are wondering why he has been relatively quiet (for his standards) in the past few months, he has been blogging all along at a ferocious pace and putting out some great content on Oracle JET in his new blog Jim's JavaScript Journal - tailored for javascript and Oracle JET applicable to all users and not specific to PeopleSoft!!! :)

Global JavaScript Injection Bootstrap for Fluid UI:

My requirements for this bootstrap are still the same as in 8.54. Since there was and still is no way to inject custom javascripts globally in Fluid, I want to create a least intrusive and highly configurable bootstrap to easily inject javascripts on the fly.

Step 1: Create a custom javascript object for the Bootstrap code

Navigation: Navigator > PeopleTools > Portal > Branding > Branding Objects (JavaScript Tab)

Note: This javascript object needs to be added online so that it provides a configuration to inject additional javascript objects.

Object Name: CSK_FL_BOOTSTRAP_JS


- This javascript object might seem a lot lengthier than my previous version but it should be cleaner and a lot more efficient.
- getScriptUrl: I borrowed this function from Jim Marion's post. It provides a nice and clean way to derive the URL for a javascript object.
- cskLoadJS: I improvised this function from the delivered loadScript function (PT_CHART_LOAD). It helps with adding a javascript (with URL to the source code) as a script element to the DOM - head section.
- cskInjectJS: I created this function just to separate the actual configuration to add/load a list of custom javascripts. Right now it only has one custom javascript.
- Immediately invoked javascript code:
  1.  Load requireJS: The first thing I do is to load requireJS. You will notice that I am not referencing any object from the database (as a javascript object) and instead I am pointing directly to the require.js library on the web server where Oracle JET resides. Much easier to render directly from the web server!
  2. Load CSK_REQUIRE_CFG_JS: Next I load a custom javascript object (again added online so it can be updated in the future). My requirejs.config is very simple at this stage and I only included couple of library paths (JQuery and JQueryUI). We could configure additional paths in the future based on other requirements.
  3. You will notice that I am passing cskInjectJS as a callback function parameter to cskLoadJS function when I load the CSK_REQUIRE_CFG_JS object. This would ensure that cskInjectJS would get fired after the CSK_REQUIRE_CFG_JS javascript is loaded.
Object Name: CSK_REQUIRE_CFG_JS


Step 2: Add custom code to PT_HEADERPAGE.Activate (Page Activate PeopleCode)

This step is the same as what I did in 8.54. PT_HEADERPAGE is a header page that is part of all Fluid UI components and is mainly used for navigation purposes. We will be adding a line of code to inject our bootstrap javascript using peoplecode.


Custom PeopleCode:

/* CSK Custom Javascript Bootstrap for Fluid - Start */
AddJavaScript(HTML.CSK_FL_BOOTSTRAP_JS);
/* CSK Custom Javascript Bootstrap for Fluid - End */


Step 3: Add CSK_FL_BOOTSTRAP_JS to the custom Homepage Header (Classic)

Step 2 takes care of the Fluid UI and associated components. Although, in 8.55, the navigation header is unified and consistent across Classic and Fluid, the way Classic and Fluid get rendered are slightly different. The PT_HEADER page object is not used in Classic. This means that step 2 would have no effect in the Classic homepages and components. We could just add CSK_FL_BOOTSTRAP_JS to the Branding System Options (as I previously showed in my Branding 8.55 post). But I want to avoid that because I found that adding scripts to Branding System Options could invoke them more than once which is not desired in this case (I will write about this topic in a separate post later). Alternatively, I simply add CSK_FL_BOOTSTRAP_JS to my custom homepage header configured on my theme (refer: Branding 8.55 - Part 1).


Step 4: Inject Javascript

Now that we have our custom javascript object (CSK_FL_BOOTSTRAP_JS) injected into all Fluid UI and Classic homepages and components, we can use that as a configuration to further inject other javascript objects.

 
Right now, I only added one javascript object CSK_FL_DBNAME_JS (which I will describe in the next section) to cskInjectJS. But you can see how we can easily inject additional javascript objects as needed.

Creating an environment specific header for Non-Production databases:

In the previous section, I described how to create a javascript injection bootstrap for Fluid. I used Oracle JET to load JQuery and JQueryUI while managing dependencies using requireJS. Now, let us see an example of how we can inject a custom javascript using the bootstrap. The custom javascript is a rewrite of my previous javascript (created for 8.54 and extended for 8.55), to create an environment specific header for Non-Production databases.

Object Name: CSK_FL_DATABASE_JS


You can see how I used requireJS to take care of loading JQuery for me. All I am doing is mentioning the libraries that I need and let requireJS do the dependency management! A lot cleaner!

Note: Please remember to add the custom styles to both the Classic - Theme Style Sheet (CSK_BRAND_CLASSIC_TEMPL_FLUID) and the Global Override Style Sheet for Fluid (CSK_BRAND_FLUID_TEMPLATE). Refer Branding PT 8.55 - Part III for more details.

Results:

Classic:


Fluid:


Notes:

  1. Details of the environment used for this post: HCM 9.2 - PUM Image 17 - PeopleTools 8.55.03.
  2. If you find any inconsistent results while going through any of the steps detailed in this post then please make sure you bounce your web and app servers and purge the cache.

Sunday, October 4, 2015

Fluid - WYSIHTML5 Editor Prototype!

I recently answered a question on the OTN forums related to rich text editor in PeopleSoft. Since PeopleTools 8.50, PeopleSoft has leveraged using CKEditor for rich text editor (aka RTE) configurations options in App Designer. As a follow up to the OTN, I wrote a small post on how to create and use custom RTE configurations, toolbars and plugins.

CKEditor in PeopleTools provides a way to create and work with a WYSIWYG (What You See Is What You Get) rich text editor.

This has found its way to several use cases ranging from but not limited to:
-    Rich text configuration fields which are then used for rich text display in HTMLAREAs
-    Content source for rich text enabled emails
-    Content source for rich text enabled BI Publisher reports
-    Content source for Enterprise Components Forms Builder – Instructions
-    Content source for rich text enabled Student Activity Guide (Configurable) Pages such as Agreement Pages, Start and Complete Pages

While this is a great utility, it is a WYSIWYG editor which means that it might only be appropriate for Classic pages and might not be suitable for Fluid. I was curious to see how a rich text enabled field appears on a Fluid page and based on my tests it appears that Fluid does not support rich text enabled fields.

RTE Field on a Fluid Page:


Results: RTE toolbar does not appear in Fluid.


We can also confirm that rich text is not supported for Fluid in PeopleBooks.

Home > PeopleSoft > PeopleTools 8.54 > Fluid User Interface Developer’s Guide > Considerations for PeopleSoft Fluid Application Implementation


We can imagine how RTE powered by CKEditor (WYSIWYG) would introduce several challenges when it comes to incorporating the editor in Fluid. But why not WYSIHTML5 - What You See Is HTML5? :)

So that is how I got started on this little pet project!

I wanted to take the same concept and create a rich text editor that is also responsive (WYSIHTML5). I used an open source project (http://wysihtml.com/) to develop a prototype for a WYSIHTML5 Editor in PeopleSoft (Fluid) that enables Responsive Rich Text.

It is still a prototype so it has a few quirks to be worked around and it is also not a fully functional RTE yet. But I think it is a great start!

Step 1: Load Open Source Project to the Web Server

Based on instructions in the http://wysihtml.com/ I downloaded the open source project (zip file), extracted/unzipped the contents and placed it on the web server.

Path:

<PIA_HOME>/webserv/<DOMAIN>/applications/peoplesoft/PORTAL.war/<site_name>


Contents:


This completes the first step to make the necessary javascripts and stylesheets (amongst other things) available on the web server.

Now moving on to incorporating this in PeopleTools.

Step 2: Create Fluid Page with WYSIHTML5 Editor (Configuration)


Legend:

1. Static HTMLAREA (1) is used to store a javascript function and a button which when invoked transfers the WYSIHTML5 contents in HTMLAREA (4) to an invisible - modifiable by javascript - long edit field (2).


The "csk_div" ID used in var x = document.getElementByID("csk_div"); is referencing an input field (WYSIHTML5 editor) in HTMLAREA (4).

2. Invisible (Modifiable by Javascript) field to temporarily store/move (PreSave) the WYSIHTML5 contents from HTMLAREA (4) to the component buffer. This helps with sending the HTML5 contents to the server during the save (3). This is kind of a hack/temporary workaround and there should be a cleaner way to get this to work. It is a "to-do" item to make this more efficient.


3. Save button to push data (component buffer) in the page to the server.


4. HTMLAREA that holds the WYSIHTML5 contents with an input/editable field (and other associated wysihtml toolbar items, styling and scripts). HTMLAREA is populated using PageActivate PeopleCode using a HTML object (CSK_WYSIHTML5).


CSK_WYSIHTML5 HTML object was built primarily based on the HTML in this example page:
http://voog.github.io/wysihtml/examples/advanced.html

Few things to note about CSK_WYSIHTML5 HTML:

- An ID attribute ("csk_div") was added to a DIV that represents the input/editable element for the HTML5 editor. This is needed because it is used in the javascript function that is part of the Static HTMLAREA (1).
- The contents in the HTML5 editor field (csk_div) are passed in using a bind variable (via Page PeopleCode).
- The script sources were appropriately adjusted to refer to the directory on the web server (where the wysihtml project is located).


Step 3: Create Fluid Page for WYSIHTML5 Display (Viewer)


This is a very simple Fluid page with a single HTMLAREA that is loaded on PageActivate as shown above. During the load,  the HTML5 contents that was created and stored using the previous page (CSK_WYSIHTML5_CFG) is retrieved and used as a parameter to HTML object (CSK_WYSIHTML5_DISP). The HTML retrieved from CSK_WYSIHTML5_DISP is them assigned to the HTMLAREA field.

CSK_WYSIHTML5_DISP was also primarily built using the following page:
http://voog.github.io/wysihtml/examples/advanced.html

Only differences are:
- Toolbar was removed (as it is a display only page).
- Made the editor display only (non-editable).
- Added a bind value to place the HTML5 contents using PageActivate code.


Let us see this in action!! 

I created a custom Fluid Hompage (Sasank's WYSIHTML5) and added the two Fluid Pages as tiles.


Fluid Page with WYSIHTML5 Editor Prototype:

- Enter "Rich Text"/Responsive contents in the editor.
- Click on "PreSave (Load to Buffer)" button.
- Click on "Final Save" button.


Legend:
1. Push buttons to save responsive rich text data.
2. Responsive rich text toolbar.
3. Responsive rich text editor.

Quirks:
- Right now, the page just refreshes if we press ENTER/carriage return on the editor. ENTER/carriage return only works when the cursor is on text that does not contain any styling. This is also a "to-do" task.
- We must click the "PreSave (Load to Buffer)" button first before clicking the "Final Save" button, otherwise the changes made in the editor will not get transferred to the server as part of the component buffer.

Fluid Page with WYSIHTML5 Display Prototype:


We can see how the rich text displayed on this page in a HTMLAREA is responsive!

Demo Videos!!

WYSIHTML5 Responsive Rich Text Editor (click here to view video in a new tab):

WYSIHTML5 Responsive Rich Text Display (click here to view video in a new tab):

I just wanted to share this project with the PeopleSoft community! A lot of javascript hacking and app designer cheats (workarounds if you will) were required to get this prototype to function. I would love to work with anyone who would like to collaborate on improving this project and see where the results take us! Perhaps a truly integrated Responsive Rich Text Editor… Perhaps a futuristic Web Based Responsive Page Development Utility… Perhaps a case for productization and potential incorporation into the PeopleSoft solution!?!?!?

Project Details:

Disclaimer: I am sharing the project primarily to seek collaborators and others who might be interested in playing with or extending this prototype. If you choose to perform any of below steps then it is at your own risk! :)

Project Environment: HCM 9.2 PUM Image 9 - PeopleTools 8.54.08

1. Download the project by clicking here.
2. Unzip/extract the project and copy it to a testing/play environment (using 'Copy From File' option in App Designer).
3. Build project.
4. Explore! Test! Explore! Test!

Notes:

1. This project which contains the WYSIHTML5 editor prototype for PeopleSoft should be considered a proof of concept only. Please do not load this into your production environment. This was purely intended for experimentation and evaluation purposes.
2. I, the author, will not assume any liability for any problems resulting from the implementation of this project.
3. All objects in the project are custom and start with the prefix "CSK_".
4. A role (CSK_WYSIHTML5_TEST) in the project should give access to both the pages above.

Please feel free to comment on this post if you have any questions/concerns/suggestions.