Showing posts with label PUM. Show all posts

Friday, December 30, 2016

DIY - PeopleSoft on the Cloud - Part 3

In this third and final part, I will demonstrate how to access the demo instance (PUM image on OPC) via SQL Developer and App Designer from an on premise workstation.

Step 1: Create Security List for database access and add to the instance

Create Security IP List:

Oracle Compute Cloud Service console > Network tab > Security IP Lists > Create Security IP List

Enter the public ip address(es) of your on premise workstation(s). This will ensure that only a trusted list of on premise ip addresses can access the database (via SQL Developer/App Designer) of your demo instance (PUM image running on OPC).

Note: If you are not sure of the public ip address of your on premise workstation then simply visit https://whatismyipaddress.com/ using a browser on the workstation.


Create Security Application:

Oracle Compute Cloud Service console > Network tab > Security Applications > Create Security Application

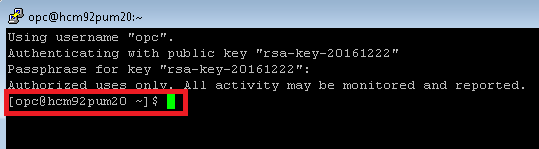
Create a Security Application to open TCP port 1522 to allow database access. You might wonder how I figured the database for the demo instance is using port 1522? We can find it in the tnsnames.ora file located in /opt/oracle/psft/pt/tools_client/ which we can access via WinSCP (refer: Part 2).


Create Security List:

Oracle Compute Cloud Service console > Network tab > Security Lists > Create Security List


Create Security Rule:

Oracle Compute Cloud Service console > Network tab > Security Rules > Create Security Rule

Using the Security IP List, Security Application and Security List that we just created, create a Security Rule as follows:


Add Security List to Instance:

Oracle Compute Cloud Service console > Instances tab > View > Under "Security Lists" > Add to Security List

In my example, the security list that I added is called 'psftuser_sec_list_1522'.


Step 2: Installing Oracle and PeopleTools Clients (SQL Developer and App Designer)

Hypothetically, if we had installed the PUM image locally and if we did not already have the Oracle and PeopleTools clients installed on the local workstation, then we would have mapped the samba drive and installed the clients from there.

I was not able to figure out how to map the samba drive of the demo instance (PUM image) running on OPC to an on premise workstation. The alternative/workaround is to connect to the instance on OPC using WinSCP from the on premise workstation (as described in Part 2), download the relevant folders locally and install the necessary clients.

We can find the content of the samba drive under the following location using WinSCP:
 /opt/oracle/psft/pt/tools_client


Step 3: Updating the tnsnames.ora file in the on premise work station

Find the database name of the instance:

Login to the instance online and navigate to the following page:
Navigator > PeopleTools > Lifecycle Tools > Update Manager > Update Manager Dashboard > Update Manager Utilities > About PeopleSoft Image


Add database to the tnsnames.ora file on the on premise workstation:

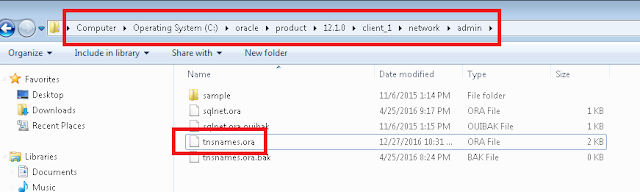
For a typical Oracle client installation, the tnsnames.ora file can be found in the following directory:
C:\oracle\product\12.1.0\client_1\network\admin


TNS Details:

HOST: Enter the public ip address of your instance
PORT: 1522
SERVICE_NAME: Enter the database name of your instance which we determine in the preceding steps

<ENTER_DBNAME> =
   (DESCRIPTION =
       (ADDRESS_LIST =
           (ADDRESS = (PROTOCOL = TCP)(HOST = <ENTER_PUBLIC_IP>)(PORT = 1522))
       )
       (CONNECT_DATA =
           (SERVER = DEDICATED)
           (SERVICE_NAME = <ENTER_DBNAME>)
       )
    )

For Example:


Step 4: Access OPC instance via SQL Developer from on premise workstation

Default Username/Password: SYSADM/SYSADM

Connection Properties:


Successful Connection:


Step 5: Access OPC instance via App Designer from an on premise workstation

Note: The default connect id and password is the same as people/peop1e

If you have not configured the default connect id/password then you can do so using Configuration Manager.

The PeopleTools client installation should be in your C drive.
For example: C:\PT8.55.11_Client_ORA\

We can find Configuration Manager (pscfg.exe) and App Designer (pside.exe) in the following location:
C:\PT8.55.11_Client_ORA\bin\client\winx86\

Connect via App Designer:

Use the database name of your OPC instance which we determined in the preceding steps.


Successful Connection:


DIY - PeopleSoft on the Cloud - Part 2

Now that we have the PeopleSoft PUM Image (DEMO environment) up and running on the Oracle Compute Cloud, we can move on and dive deeper into more interesting topics! This post will detail how we can set up SSH access and connect to the PUM Image via PuTTY and WinSCP to perform PSADMIN activities such as configuring, bouncing and clearing cache on the app/web/process scheduler servers.

Step 1: Create Security List for SSH access and add to the instance

Create Security List:

Oracle Compute Cloud Service console > Network tab > Security Lists > Create Security List


Create Security Rule:

Oracle Compute Cloud Service console > Network tab > Security Rules > Create Security Rules


Add Security List to Instance:

Oracle Compute Cloud Service console > Instances tab > Instances > View > Under "Security Lists" > Add to Security List

In my example, the security list that I added is called 'allow_admin_clients'.


Step 2: Configuring PuTTY and logging in to the instance using SSH

After creating the Security List and adding the instance it (step 1), we are now ready to proceed with the steps detailed in the tutorial:
- Logging in to your instance using SSH

The steps detailed in this section of the tutorial are straight forward. I was able to use the "Logging in from a Windows System" instructions and connect to my PUM image (running on OPC - Oracle Public Cloud) via SSH using PuTTY running on my on premise workstation.


Note: The first time we successfully login via PuTTY as opc user, we will be prompted to change the default password (OracleCloud). Make sure that you change and notate the new password!

Refer: Changing the default password for opc user

Step 3: Configuring WinSCP and logging in to the instance using SCP

Before I proceed with demonstrating how to access PSADMIN using PuTTY, I want to detail how to similarly configure WinSCP to connect to the instance running on OPC. I use WinSCP heavily for various activities such as navigating to and deleting web server cache folder, viewing db/app/web server log files, loading custom javascript libraries to the web server, loading custom jar files to the app/web servers and so on.

Open WinSCP > New Site
- File protocol: SCP
- Host name: Enter the public IP of your instance
- Port number: 22
- User name: opc
 Advanced Site Settings > SSH > Authentication:
- Private key file: Point to the location where you stored your SSH private key (.ppk)


Save the configuration and login. You will be prompted to enter your SSH Key passphrase.


Step 4: Accessing PSADMIN via PuTTY

We already saw in step 2, how we could connect to the instance via PuTTY. This involves using the opc user provided to us as part of the tutorial instructions.


In order to access, PSADMIN it is best if we use psadm2 (one of the default users created in PUM images). Here are the commands that allow us to switch from opc user to psadm2 user and invoke PSADMIN.

Command: sudo -s
Description: Switch to root

Command: su psadm2
Description: Switch to psadm2

Command: cd $PS_HOME/appserv
Description: Change directory to appserv folder under $PS_HOME

Command: ./psadmin
Description: Invoke PSADMIN


Once we are in PSADMIN as psadm2 user, the steps to bounce and purge cache on the app/web/process scheduler servers are the same as detailed in one of my older posts.
Refer: PeopleSoft PUM Image - Virtual Machine - How to access PSADMIN

We are now able to access PSADMIN of our demo instance (PUM image running on OPC) via PuTTY (SSH) from an on premise workstation!

DIY - PeopleSoft on the Cloud - Part 1

There has been tremendous improvements in PeopleTools 8.55 - which we have seen over the past year - specifically involving changes that make deploying PeopleSoft on the Cloud a very real, intuitive and easy prospect.

Of course, deploying PeopleSoft on a hosted environment is not new and has been done in the past. But 8.55 makes it so much more easier.

Most of us who work in the PeopleSoft space are already getting used to the various messaging from Oracle around Cloud and what it means to those using PeopleSoft applications. There are several great presentations (at conferences), webinars and documentation relevant to this subject which I guess is one of the hottest topics right now.

In this series of blog posts, I plan to take a very basic use case of deploying a PeopleSoft Update Image (DEMO) on the Oracle Compute Cloud and document the steps that I followed. I also intend to go beyond the immediate necessity of getting the environment up and running; and accessing the PIA for evaluating the latest features, enhancements and bug fixes. Additionally, this blog series will also cover how we can connect to the PUM Image - running on the Oracle Compute Cloud - using PuTTY, winSCP, SQL Developer, App Designer, etc. from an on-premise workstation to perform PeopleSoft administration and development related activities.


Note: At the time of writing, I am using a FREE TRIAL (30 day) access which is available for most Oracle Cloud services.

Part 1 (current post): Will cover what it takes to sign up (for the initial 30 day free trial), get started, up and running with a PeopleSoft Update Image (available on the Oracle Cloud Marketplace) deployed on the Oracle Compute Cloud.

Part 2: This post will cover how we can access the PUM Image deployed on the Oracle Compute Cloud (via SSH) using PuTTY and winSCP from an on-premise workstation to perform PSADMIN activities like administering and configuring the servers at various tiers.

Part 3: This post will cover how we can access the PUM Image deployed on the Oracle Compute Cloud using SQL Developer and App Designer from an on-premise workstation to perform PeopleSoft development related activities/research.

Before I proceed with Part 1, I would like to share a few resources that I highly recommend for those who are new to the concept of "PeopleSoft on the Cloud".

Resources:

Quest Webinar: PeopleSoft on the Cloud - so, how do you use it?
Information Portal: PeopleSoft on Oracle Cloud
Oracle Red Paper: Getting Started with PeopleSoft Environments on the Oracle Compute Cloud Service
PeopleSoft Apps Strategy Blog: PeopleSoft on Oracle Cloud

I would also like to make a special mention to Logesh Balasubramaniam - from Presence of IT and author of "Lean IT Designs" blog - who was very helpful in sharing his knowledge and experiences on this topic.

The rest of this post will be heavily based on the following tutorial with some of my tips and experiences:
Deploying PeopleSoft Applications on Oracle Compute Cloud Service Instances

Step 1: Request a free trial access to the Oracle Compute Cloud

If you are - like me - new to hands on activity on the Oracle Cloud, you may perhaps be reminded of the following quote from The Rime of the Ancient Mariner by Samuel Taylor Coleridge.

"Water, water, every where,
Nor any drop to drink."

To me, it was not very obvious which of the myriad Oracle Cloud Services I should be subscribing to and activating to deploy a PeopleSoft PUM Image from the Oracle Cloud Marketplace.

After working with the "Live Cloud Chat" team, I figured I needed the "Oracle Cloud PaaS and IaaS" Service.

To get started, navigate to https://cloud.oracle.com/tryit and click on the "Try It" link under "Platform and Infrastructure".


At this point, you will be prompted to signin with your Oracle account. Based on my personal experience and what I heard from the support team, the chances of getting the trial request processed in a timely fashion are much higher if you are using your enterprise id instead of a personal id.

Here is an excerpt from my conversation with the "Live Cloud Chat" team:
"Please note trials coming from personal email addresses (Yahoo/Gmail/Hotmail etc.) are not being processed at the moment, if you want to request for a trial of our cloud services please register using an official email ID (enterprise email: @yourcompany.com)"

Step 2: Wait until you receive an email from Oracle!

If you used an enterprise email address, you should get an email from Oracle (within an hour) which contains the access and subscription details.


Now we are ready to proceed further.

Step 3: Follow steps 1 through to 6 in tutorial

Now we are ready to go through the following steps in the tutorial:
Deploying PeopleSoft Applications on Oracle Compute Cloud Service Instances
  1. Generate an SSH key pair using an on-premises Linux or Microsoft Windows system.
  2. Upload the SSH public key to Oracle Compute Cloud Service.
  3. Configure the Oracle Compute Cloud Service instance for HTTP access.
  4. Determine the PeopleSoft application to be deployed and initiate deployment in Oracle Cloud Marketplace.
  5. Use the Oracle Compute Cloud Service web console to configure the instance that will be used to host the PeopleSoft application.
  6. Sign in to the PeopleSoft application.
Note: Please review Part 2 before proceeding with further steps in the tutorial (related to using SSH) because there are some security steps that are missing.

Once we complete the above mentioned steps (1-6) from the tutorial, we can login to the PIA of the PUM image running on the Oracle Compute Cloud. Since we opened the http port 8000 (or https depending on your choice), we can access the environment from anywhere via the internet!

Tip 1: Uploading the SSH public key

How do we determine our Cloud Data Center while signing into Oracle Cloud My Services application?


One way is to login to the "My Account Administration" received in the email (Step 2).

From Email:


Note the Oracle Compute Cloud Service Details from the Dashboard.


Tip 2: Configuring the instance

The screens for configuring the instance have changed in comparison to the tutorial but here are the main items to consider.

Image Settings:


Shape Settings:


Instance Settings:


Make sure you add the SSH Public Key (created in Step 1 of the tutorial):


Storage Settings:


Tip 3: Waiting for the instance to be "Running" after initiating the creation

After configuring, reviewing and creating the instance, I was not able to see the created instance (in "Preparing" status) in the Instance tab right away. Instead, I could only find 3 orchestrations with statuses as shown in the image below. This is normal!


I would encourage you to remain patient and wait for at least a couple of hours for the instance to show up in the Instance tab with a "Running" status as shown below before proceeding with subsequent steps.


Related Links:

DIY - PeopleSoft on the Cloud - Part 2
DIY - PeopleSoft on the Cloud - Part 3

Saturday, November 29, 2014

PeopleTools 8.54 - Branding - Part 2

This is a continuation of my previous post on my experiments with PeopleTools 8.54 Branding.

The general theme I would like to continue is to explore how we can leverage the new features and configuration provided in PeopleTools 8.54. The idea is to see how far we can go without having to use App Designer (using just the online configuration).

Now that we learnt how we can easily change the logo of the application in Part 1, let us see how we can further brand the application.

Changing the background color of the Branding Header:


We can see from the screenshot that the background color for the branding header div (pthdr2container) is actually an image PT_HEADERBG_CSS.JPG which is repeated to cover the background entire div (repeat-x).

Note: If you are wondering how we can see html and css generated on the browser as in the screenshot above, I am using Firebug which is a Web Developer add-on for FireFox. Most browsers have Web Developer support similar to Firebug. It is highly recommended to use such tools to understand the html, javascript and css that are being used on a page.

PT_HEADERBG_CSS image for reference:


Let us see how we can override this delivered background image:

- Upload custom background image:

PeopleTools > Portal > Branding > Branding Objects (Images Tab)

Note: In this case, I am using a background image that is of similar height and width as the delivered PT_HEADERBG_CSS image because my custom branding header div (pthdr2container) is of the same height as the delivered div. If the custom branding header div is of a different height then please be sure to create your custom background image of similar height to cover the entire div.


- Create custom style to override the background on the branding header div (pthr2container):

PeopleTools > Portal > Branding > Branding Objects (Style Sheet Tab)


We can see how a new style was added and how it uses the id selector (#) and class selector (.) to specifically target the element (div) with id = "pthdr2container" and class = "pthdr2container". This style is referencing the custom background image CSK_HEADERBG_CSS.

- Include custom style sheet definition on the Branding System Options Page:

PeopleTools > Portal > Branding System Options


This would ensure that our new style sheet is also loaded while rendering the page.

- Test changes:

Recommendations if you are experiencing caching issues:
  1. Clear local browser cache.
  2. Shutdown, purge cache and reboot the web server(s).


Changing the background color of the Navigation Drop-Down Menu:


We can see in the screenshot that the background color for the Navigation Drop-Down Menu is coming from the image PT_BREADCRUMB_CSS3. The nav element (pthnavcontainer) is enclosed within the dropdown menu div element (ptdropdownmenu).

PT_BREADCRUMB_CSS3 image for reference:


Let us see how we can override this delivered background image:

- Upload custom background image:

PeopleTools > Portal > Branding > Branding Objects (Images Tab)

Note:Again, in my case I am using a custom background image that is of the same height as PT_BREADCRUMB_CSS3.


- Create custom style to override the background on the Navigation Drop-Down Menu (nav element):

PeopleTools > Portal > Branding > Branding Objects (Style Sheet Tab)


We can see in the screenshot that we are using the existing style sheet (CSK_BR_GEN) to add the new style. The new style is using the id selector (#) and the descendant selector (e.g.: X Y, where Y is a descendant of X) to target the element (nav) with id = "pthnavcontainer" and is a descendant of element with id = "ptdropdownmenu". This style is referencing the custom background image CSK_BREADCRUMB_CSS3.

Note: As we already have the style sheet CSK_BR_GEN added to the 'Branding System Options', we can directly proceed to test these changes.

- Test changes:

Recommendations if you are experiencing caching issues:
  1. Clear local browser cache.
  2. Shutdown, purge cache and reboot the web server(s).


Sticking with our theme, we have now implemented a custom logo, custom branding header background image and custom navigation drop-down menu background image by just using the PeopleTools Branding features and configuration available online.

Changing the font color of Branding Header System Links (Home, Worklist, ..., Sign out):


We can see in the screenshot that the System Links on the Branding Header is using the style class of PSHYPERLINK (color: #004b91). As most of you know, this style class is widely used across the application.

Let us see how we can use css to specifically target the required elements and override the font color:

- Create custom style to override the font color of the Branding Header System Links:


We can see in the screenshot that we are using the existing style sheet (CSK_BR_GEN) to add the new style. The new style is using the id selector (#), class selector (.) and the descendant selector (e.g.: X Y, where Y is a descendant of X). This style would target all elements with class = "PSHYPERLINK" and are descendants of element with id = "pthdr2syslinks".

- Test changes:

Recommendations if you are experiencing caching issues:
  1. Clear local browser cache.
  2. Shutdown, purge cache and reboot the web server(s).


Changing the font color of the Navigation Drop-Down Menu:


We can see from the screenshot that the font color (#284562) of the Navigation Drop-Down Menu is using the style .pthnav a (all anchor elements which are descendants of element with class = "pthnav").

Let us see how we can override this delivered font color:

- Create custom style to override the font color of the Navigation Drop-Down Menu:


We can see in the screenshot that we are using the existing style sheet (CSK_BR_GEN) to add the new style. The new style is intended to specifically target all anchor elements (a) that have a descendant hierarchy of #ptdropdownmenu #pthnavcontainer .pthnav. The descendant hierarchy would target all anchor tags that are descendants of elements with class = "pthnav" which are in turn descendants of elements with id = "pthnavcontainer" which are in turn descendants of elements with id = "ptdropdownmenu".

- Test changes:

Recommendations if you are experiencing caching issues:
  1. Clear local browser cache.
  2. Shutdown, purge cache and reboot the web server(s).


Let us now look at how we can further branding our application with some more common branding requirements.

Note: I am not a big fan of the bright red font color on the Branding Header (it was just used as an example) and besides the orange/yellow and delivered blue go well with the CSK team colors. So I will be reverting the font color changes which I just made for future examples to make it a bit easier on the eyes.

Adding a Hyperlink to the Branding Logo:


Let us assume we want our logo to image to link to another website.

- Create URL Definition to store the hyperlink address:

PeopleTools > Utilities > Administration > URLs


- Modify existing style for the Branding Logo:


CSK_HDR_LOGO was created in example provided in Part 1. We can see from the screenshot that the style has been modified to comment out the content attribute.

- Modify logo element in the custom Header Layout Definition:

PeopleTools > Portal > Branding > Define Headers and Footers

-> Additional Options for leaf cskhdrlogo


We have replaced the existing Static HTML (which was a non-breaking space &nbsp;) with an anchor element referencing the URL Definition (href), Image Object (img element) and URL Definition Description (title).

- Test changes:

Recommendations if you are experiencing caching issues:
  1. Clear local browser cache.
  2. Shutdown, purge cache and reboot the web server(s).


Moving Branding Elements using CSS:


Most organizations would like to print the name of the database (e.g.: DEV, TST, UAT, etc) on the branding header for test environments. Let us move the ptgreetingmessage div to make way for the Database name to be printed on the branding header. We will use css to move the ptgreetingmessage div to the bottom right hand corner of the header.


Create custom style to override the alignment and location of the ptgreetingmessage div:


Modify the ptgreetingmessage (div) leaf on Header Layout for logical ordering:


Test changes:


Adding Database Name on the Branding Header:


Now that we moved the ptgreetingmessage div and made way for displaying the database name, let us use custom javascript to achieve this requirement. We could directly use the %dbname meta-html in a div to display the database name but we will be using a javascript to write some logic to only display database name in non-PROD environments.

- Create custom style for the database name:


This style is cloned from the delivered greeting style class to replicate the font and location.

- Add new leaf to represent the database name element on the Branding Header Layout:


We added a new child element under the pthdr2container. This element is a static javascript object (cskdbname) which is ordered after the cskhdrlogo element.

Note; In the javascript, replace PROD_DBNAME with the actual name of the Production Database. The javascript is intended to not display the name of the database for Production.

- Test changes:

Recommendations if you are experiencing caching issues:
  1. Clear local browser cache.
  2. Shutdown, purge cache and reboot the web server(s).


I found that adding static javascript to the Header Layout breaks the "Preview" functionality on the page. Here are the results of clicking/expanding the "Preview" functionality on the "Define Headers and Footers" page when it contains a static javascript object.


The reason this occurred is because the document.write in the javascript is overwriting the page. Let us replace the static javascript with a javascript object to avoid the issue with the preview.


Result:


Note: document.write is not generally recommended. In this case, we got away with it because it is being used at the header level and does not interrupt the page that is loaded during runtime.

Although document.write works in our case, to comply with best practice let us replace the document.write with Document Object Model (DOM).

Modified JavaScript (CSK_DBNAME):

if ("%dbname" !== "PROD_DBNAME")
{
   // document.write("<div id='cskdbname' class='cskdbname'><p>%dbname</p></div>");

   // create div for dbname
   var dbname = document.createElement("div");

   // set attributes and innerHTML
   dbname.setAttribute("id","cskdbname");
   dbname.setAttribute("class","cskdbname");
   dbname.innerHTML = "<p>%dbname</p>";

   // insert dbname div after the cskhdrlogo div
   var logo = document.getElementById("cskhdrlogo");
   document.getElementById("pthdr2container").insertBefore(dbname, logo.nextSibling);

}

We have commented out the document.write and replaced with DOM to create the DIV element, set attributes, set innerHTML and finally added the div to the pthdr2container element. We are using the logo.nextSibling as a logical selector for the next child of pthdr2container after cskhdrlogo because we do not know if ptsearchbox would be displayed at runtime (e.g.: in cases where SES is turned off).


So far we have seen some of the more common branding requirements and we were able to achieve all of them by just using the online configuration pages. I hope this is definitely something everyone would be excited about!

In the next part (as time permits), I would like to look into some of the more advanced branding requirements like using a custom image on the PeopleTools Timeout message (which contains the Oracle Logo), displaying a more dynamic, user specific greeting message, adding Google Analytics javascript and migrating the branding modifications.

As always, I would appreciate any feedback/improvements that could be made to the content of this post.

Custom CSS for Reference:

Object Name: CSK_HDR_LOGO


Object Name: CSK_BR_GEN